
Web Form Trigger
Use a Web Form Trigger when Builders should host a browser form and start a published workflow for every accepted submission. The trigger provides the form URL, layout designer, field controls, styling, access protection, file uploads, and the initial structured workflow input.
This article uses the separate Documentation - Web Form Trigger pipeline in the Hack It UP - event project. The example collects event registration details and sends each submission to a Render Block for inspection.
Add the trigger
Drag Web Form Trigger from Triggers onto the Designer canvas and open its settings. Connect Out to the first validation, transformation, or persistence block.
The read-only Form URL identifies the hosted form for this pipeline. The URL becomes usable only after the pipeline version is published. Copy it from the trigger settings instead of constructing it manually.
Configure the form
Set the public identity and submission structure before adding fields.


| Setting | Behavior |
|---|---|
| Title | Main heading shown at the top of the hosted form. |
| Form root key | Required property that contains the submitted field values in workflow input. Use a stable key such as registration. |
| Submit label | Text displayed on the form submit button. |
| After submit message | Confirmation shown after Builders accepts the submission. Do not use it as proof that every downstream action succeeded. |
| Style type | Uses either a built-in template or complete manual CSS. |
| Style template | Selects Clean, Compact, Dark, VS Code Dark, VS Code Light, Google Blue, or Google Material when template styling is active. |
The example uses registration as its root key. A successful submission starts the workflow with a value shaped like this:
{
"registration": {
"attendeeName": "Ada Lovelace",
"attendeeEmail": "ada@example.com",
"attendanceDate": "2026-09-18",
"track": "automation-ai",
"topics": [
"workflow-automation",
"reliable-integrations"
],
"experienceYears": 3,
"notes": "Vegetarian meal",
"badgePhoto": {}
}
}
The exact uploaded-file value contains the descriptor produced by the selected storage mode. Inspect one controlled run before addressing its path, MIME type, size, or storage location in later blocks.
Changing the root key or a field key changes downstream template paths. Treat those values as part of the workflow contract once consumers use expressions such as {{input.registration.attendeeEmail}}.
Build the layout
The Designer separates reusable layout items, display-only elements, input fields, the current form layout, and properties for the selected item. Drag items into Form layout, reorder them with their handles, and select an item to edit its properties.
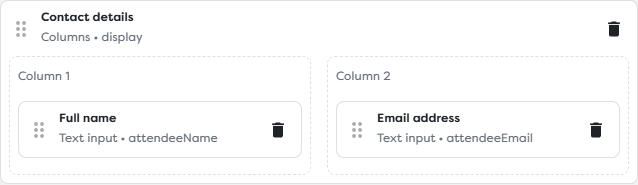
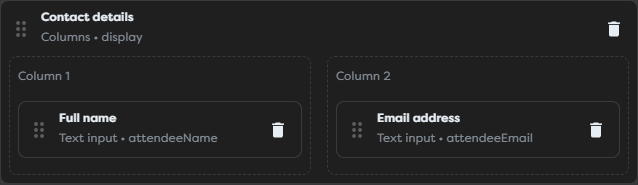
Use Columns to group related fields on one row. A column group supports one to six columns, individual widths, a pixel gap, top and bottom margins, and nested field lists. The published form collapses columns to a single column on narrow screens, but preview both desktop and mobile-sized layouts before publishing.
The example places Full name and Email address in a two-column contact group. Their keys remain attendeeName and attendeeEmail; the column container is display-only and does not add another object level.
Display elements organize the form without contributing values to the submission:
| Element | Use |
|---|---|
| Text | Static instructions, headings, or section notes with a configurable font size. |
| Image | An image from a URL, Static Drive, or Google Drive integration, with alternative text. |
| Separator | A visual divider with configurable spacing above and below. |
| Columns | A responsive grouping for nested fields. |
Keep instructions concise and place them before the fields they explain. Add meaningful alternative text to informative images and leave decorative imagery out of operational forms.
Choose field types
Every input field needs a stable ID for the designer and a Key for submitted data. Labels should describe the requested value, while placeholder and help text provide examples or constraints without replacing the label.
| Field | Submitted value | Important options |
|---|---|---|
| Text input | String | Label, key, placeholder, help text, required state, and default value. |
| Date | YYYY-MM-DD string | Required state and default value. |
| Number input | Number | Required state and default value. |
| Text area | String | Rows, columns, maximum length, placeholder, and help text. |
| Radio | One option value | Label/value option pairs and required state. |
| Multi select checkbox | Array of option values | Label/value option pairs and required state. |
| Dropdown | One option value | Label/value option pairs and required state. |
| Password | String with masked browser display | Required state and the same downstream handling risks as any other submitted string. |
| File | One file descriptor or an array of descriptors | Single or multiple mode, accepted types, per-file size limit, storage mode, and destination path. |
Option labels are visitor-facing text. Option values become workflow data and should be short, stable identifiers such as platform-engineering. Do not change them merely to revise display wording.
Web Form Trigger does not provide a dedicated email field or arbitrary JSON Schema for the whole submission. An email address collected with Text input is still a string. Validate its format and all business rules in the first downstream block before sending messages, writing records, or calling integrations.
Apply validation
Use Required for values without which the workflow cannot proceed. Use Maximum length on text areas and the native date or number control when their value type matches the question. Browser constraint validation improves feedback, but it is not a security boundary.
Builders field controls map to standard browser form behavior described by MDN constraint validation. Add downstream validation for rules such as:
- normalized email address format and allowed domains;
- event dates that are currently bookable;
- allowed option values rather than arbitrary submitted strings;
- maximum array size for multi-select values;
- consent or eligibility requirements;
- duplicate registrations and capacity limits;
- file signature, MIME type, dimensions, and malware policy.
Reject invalid data before external effects. Client-side controls can be bypassed by a direct request, an altered browser, or future form changes.
Configure file uploads
For a File field, choose single or multiple, set a per-file size and unit, and specify accepted file types with an HTML accept expression such as image/png,image/jpeg.
The accept expression guides the operating-system file picker; it does not prove that the selected bytes match the claimed type. Validate uploaded content downstream. See MDN's accept attribute reference.
Choose a storage mode deliberately:
| Storage | Use it when | Operational consideration |
|---|---|---|
| Context | The file is temporary input for this workflow run. | Process or copy it before the run context expires. |
| Static | The file must remain available in Builders Static Drive. | Use a unique destination and define retention and access rules. |
Build destinations from trusted identifiers, for example registrations/{{run.id}}/badge. Do not place an unvalidated visitor filename directly into a path. Treat file names, MIME types, image metadata, documents, and archive contents as untrusted input.
Avoid collecting identity documents, payment-card data, health data, account passwords, API keys, or other high-risk values unless the entire workflow and organization have an explicit lawful and secure handling design. A Password field only masks characters on screen; the submitted value still enters the workflow as data.
Style and preview the form
Start with a built-in template so layout, focus states, responsive behavior, and submission messaging remain predictable. Use Manual CSS only when the published form needs branding that cannot be expressed by a template.
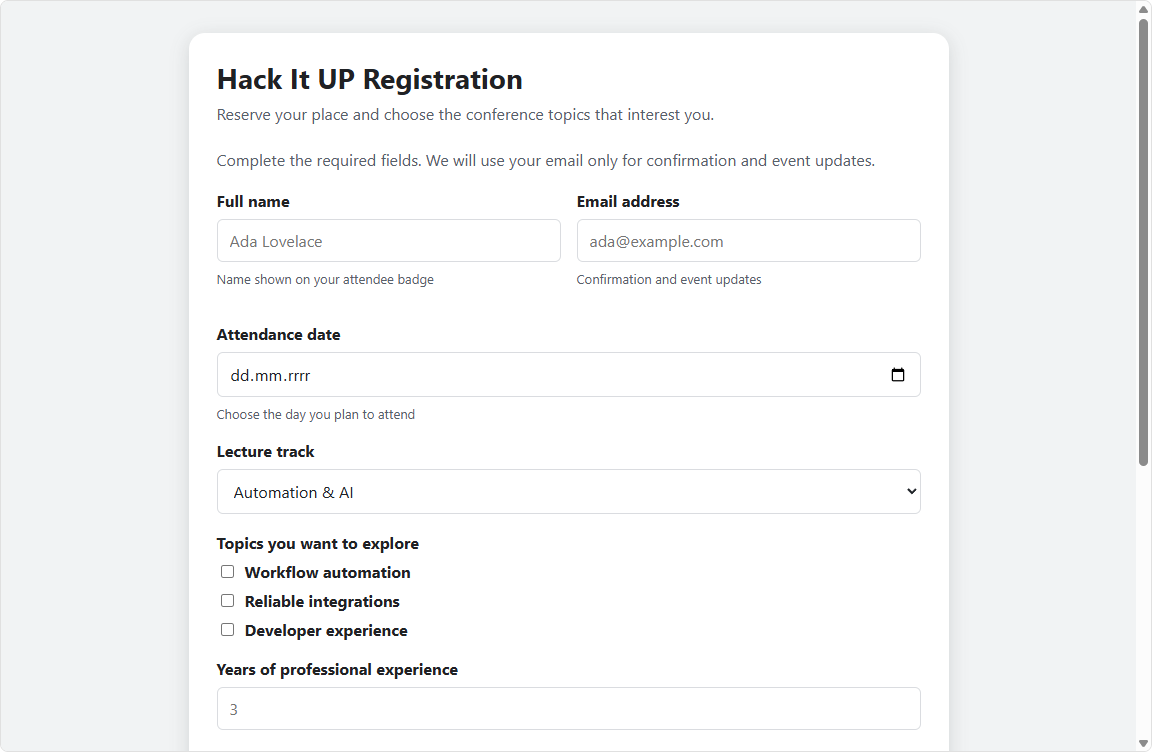
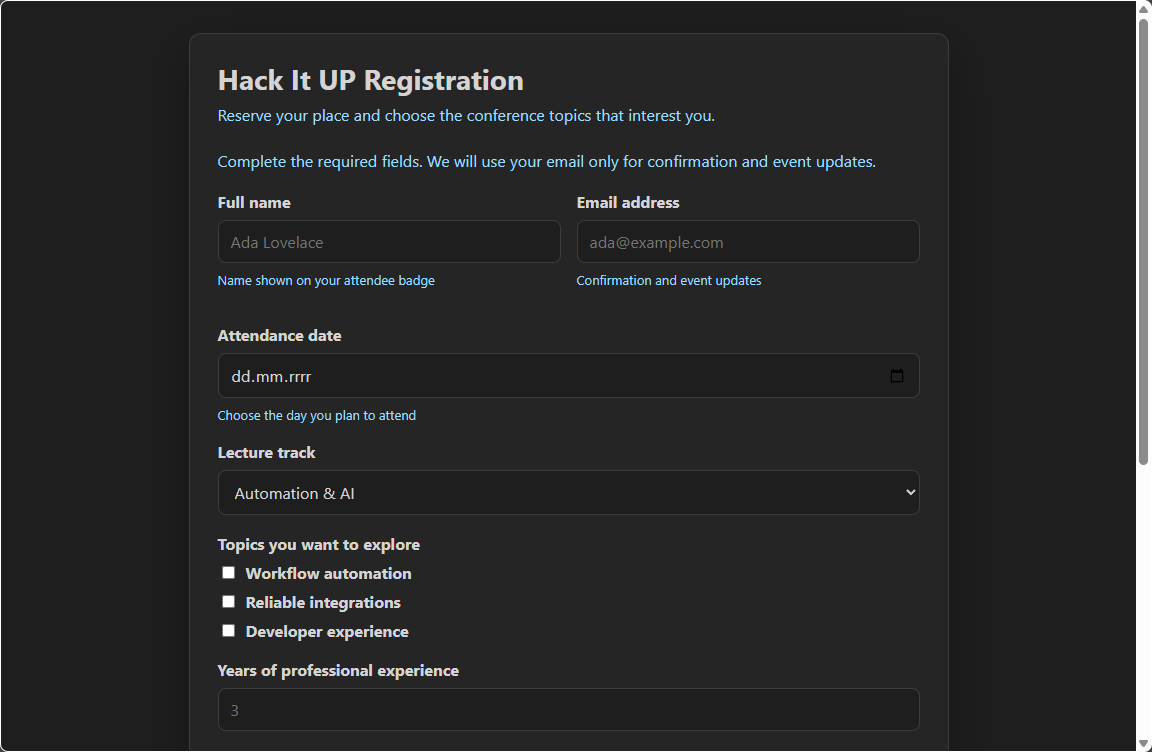
Select Preview after every material layout or style change. Check:
- labels, help text, placeholders, and required indicators;
- the order of fields and keyboard focus;
- column behavior at narrow widths;
- text contrast and visible focus states;
- long labels, validation messages, and the completion message;
- single and multiple file controls;
- the light and dark presentation used by the selected template.
Manual CSS is the complete CSS used by the published form. Test it after Builders or browser updates and keep selectors scoped to the provided form classes. Do not hide labels, validation feedback, the submit state, or the message area.
Protect access
Authorization is checked before the form is rendered.
| Authorization | Behavior | Suitable use |
|---|---|---|
| Public | Anyone with the URL can load and submit the form. | Public registration or contact forms whose downstream path handles abuse and untrusted input. |
| Basic | Accepts one of up to ten configured username/password pairs through HTTP Basic authentication. | Small controlled audiences where browser-native credentials are acceptable. |
| Token | Requires the configured secret in the x-auth-token request header. | Programmatic clients or a trusted proxy able to add a custom header. |
| Bearer verification | Validates Authorization: Bearer through the configured HTTP verification request. | A protected surface integrated with an external identity or token-verification service. |
A visitor opening a normal link cannot conveniently add x-auth-token or Authorization headers. For browser users, use Public, Basic, or a trusted application/proxy that performs the required authentication flow.
Store Basic passwords, access tokens, and verification credentials only in their sensitive settings. Use different credentials per environment, rotate exposed values, and do not include them in screenshots, URLs, custom CSS, field defaults, workflow output, or logs.
Public authorization does not add rate limits, CAPTCHA, identity verification, or deduplication. Add abuse controls before expensive AI, email, database, or integration actions and monitor submission volume.
Publish and test
Preview does not activate the hosted URL. A form starts live workflow runs only from a published pipeline version.
- Connect Out to a validation or Render Block.
- Save the draft and resolve Designer validation errors.
- Preview the form in its intended template and responsive widths.
- Publish the intended version.
- Open the exact Form URL shown in Web Form Trigger settings.
- Submit one unique test registration with non-sensitive values.
- Open the resulting published run and inspect the trigger input.
- Confirm that values appear below the configured root key and that option, number, date, array, and file values have the expected types.
- Verify downstream effects and the visitor-facing completion message separately.
The published example exposes https://builders.boilerplate.com/forms/{projectId}/{pipelineId} and accepts the configured registration fields. Keep using the copied Builders URL; project and pipeline identifiers are implementation details, not a reason to hand-build links.
Publishing makes the selected version read-only. Create or edit a draft version for later changes, test it independently, and publish only when its field contract is ready for live submissions.
Process submissions safely
- Normalize and validate every field before using it in SQL, HTML, file paths, prompts, shell commands, or external requests.
- Escape visitor text for the destination context rather than relying on form rendering.
- Use a server-side identity or unique registration key to prevent duplicate external effects.
- Add capacity checks atomically when several visitors can claim the last available place.
- Minimize logs containing names, email addresses, accessibility notes, dietary requirements, or uploaded files.
- Define retention and deletion for stored submissions and uploads.
- Keep notification failures separate from registration acceptance so a missing email does not silently discard a valid record.
- Record enough correlation data to connect the form submission, Builders run, stored record, and external messages without exposing secrets.
Troubleshoot Web Form Trigger
- The form URL does not load: confirm that the intended pipeline version is published and copy the URL again from the trigger settings.
- The published page shows an older form: verify which version is public; unsaved or unpublished draft changes do not affect the live surface.
- A field is missing from workflow input: display-only Text, Image, Separator, and Columns items do not submit keys. Confirm the input field has a stable key.
- A downstream expression is undefined: inspect a real run and include the configured root key, for example
{{input.registration.attendeeEmail}}. - An email address is malformed: Text input does not provide email-specific validation; validate the string downstream.
- A required field appears optional: save the field settings, publish the updated version, and test the actual hosted form rather than only Preview.
- Columns overflow on mobile: review field labels and manual CSS, then preview at a narrow width; built-in templates collapse columns responsively.
- A file cannot be selected: compare its extension and MIME type with the File field's
acceptexpression. - A selected file should have been rejected:
acceptis a picker hint. Validate type, signature, and size in the workflow. - A file path collides with another submission: use
{{run.id}}or another validated unique value in the destination. - Token-protected access fails in a browser: a normal navigation does not add the required custom header; use a suitable client or authentication proxy.
- Visitors submit the form repeatedly: add downstream deduplication and abuse controls; Public mode does not identify a visitor by itself.
- The completion message appears but an action failed: inspect the run and downstream block logs. The browser message confirms form acceptance, not every later effect.
Next steps
- Publish a Web Form
- Trigger Blocks
- Use Template Expressions
- Read Block Logs and Output
- Run Published Workflows
Continue with Chat Trigger to publish a hosted or embedded conversation that returns workflow output to each visitor message.