Workflow Blocks
Blocks are the reusable steps that make up a Builders workflow. A block can receive runtime data, perform one operation, and expose one or more outputs for downstream blocks. Triggers start runs, conditions choose paths, actions interact with services, and layout blocks document the diagram without executing.
Use this section to choose the correct block, understand its requirements, configure its inputs, and verify its behavior in a controlled run.
Find blocks in the Designer
The block catalog is displayed on the left side of Workflow Designer. Select a category heading to expand or collapse it, or use Ctrl + P to focus block search when the catalog is available.
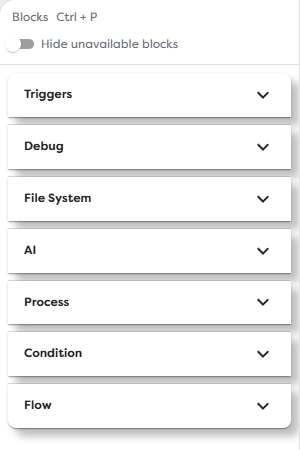
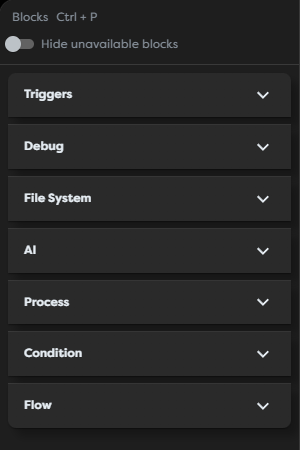
The current catalog groups blocks into these interface categories:
| Catalog category | Typical purpose | Examples |
|---|---|---|
| Triggers | Start a workflow from a manual action, schedule, public surface, or external event. | Manual Trigger, Cron Trigger, Endpoint Trigger, Web Form Trigger |
| Debug | Pause execution or render data during development and runtime. | Sleep, Render Block |
| File System | Read and save text or binary file content. | Read File, Save File |
| AI | Generate model output and optionally use approved tools. | AI Agent |
| Process | Transform data, call services, query resources, synchronize paths, and perform integration-backed actions. | Code, DB Query, Web Request, Send Email, Transform, Wait for all |
| Condition | Route execution according to expressions or named cases. | If, If / Else, Switch |
| Flow | Compose workflows or organize the canvas. | Subflow, Area, Sticky Note |
The documentation separates some large catalog groups into more focused sections. For example, Process contains general processing blocks, messaging actions, and integration actions, while Flow contains both the executable Subflow block and non-executable layout elements.
Read a catalog item
Every item shows a display name and a stable block type identifier. Send Email is the readable name, while email.send identifies its schema type. The type identifier is useful when reviewing exported workflow JSON, logs, or validation errors.
A block can also display a status marker:
- a public marker indicates that the trigger starts live runs only after the pipeline is published;
- a muted item with a dashed outline is unavailable because the current project does not have a required capability or resource;
- a normal item can be dragged onto the current canvas immediately.
Display names on the canvas can be changed to describe their business role. Renaming process.transform to Normalize Registration does not change the underlying block type.
Show or hide unavailable blocks
Enable Hide unavailable blocks to keep the catalog limited to blocks that can currently be added. Disable it when planning a workflow or checking which integration must be configured first.
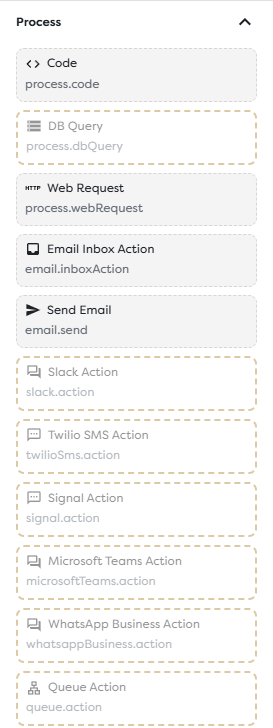
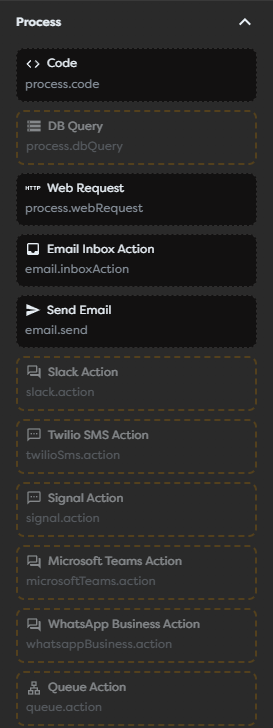
Availability depends on the block:
| Requirement | Examples |
|---|---|
| Compatible integration | Slack Action, Twilio SMS Action, Queue Action, Issue Action, SSH Action |
| Configured database | DB Query |
| AI access | AI Agent through Builders AI or a configured private AI agent |
| Storage destination | File blocks that use an integration-backed storage location |
| Another accessible pipeline | Subflow |
| Published workflow | Live triggers such as Cron, Endpoint, Web Form, and integration event triggers |
Showing an unavailable item does not make it usable. Configure the required resource in the same personal or team ownership scope as the project, then return to the Designer and select it from the block settings.
Understand executable blocks
Most executable blocks share the same core concepts:
| Element | Purpose |
|---|---|
| Input port | Receives data and execution from an upstream block. A trigger creates the initial input instead. |
| Output port | Passes the result to the next block. Conditions and some actions expose several named outputs. |
| Settings | Define the operation, resource, validation rules, and block-specific behavior. |
| Template fields | Resolve values such as {{input.registration.attendee.email}} at runtime. |
| Runtime state | Reports whether the block is waiting, running, successful, failed, or cancelled. |
| Logs and output | Show the messages and rendered result recorded for one execution instance. |
Connections determine which output can start each downstream step. A block runs only when its path is reached and its required input is available. Several outgoing connections can create parallel paths; a condition selects named branches; Wait for all joins several paths before work continues.
Distinguish triggers, actions, and layout blocks
A workflow normally contains exactly the elements needed for one automation:
- Add a trigger that represents the real entry point.
- Add processing, condition, file, AI, messaging, or integration blocks for each required effect.
- Connect named outputs to the blocks that should run next.
- Add Wait for all when several required branches must finish before continuing.
- Use Subflow when a separate pipeline owns a reusable part of the process.
- Use Area and Sticky Note only to organize or explain the diagram.
Area and Sticky Note blocks do not receive runtime data, consume compute tokens, or change execution order. A visual overlap between an Area and an executable block is not an execution connection.
Configure blocks safely
After adding a block, open its settings and complete every required field. Resource selectors are ownership-aware: a personal project cannot automatically use a team-owned integration, database, agent, or pipeline, and the reverse also applies unless the product explicitly exposes that resource in the current scope.
Use template expressions for values that must come from a trigger, an earlier block, General Vault, or run metadata. Keep secrets in supported Vault or integration fields instead of embedding them in labels, templates, code, exported schemas, or screenshots.
Before publication:
- Save the current draft.
- Run a controlled test from each relevant trigger path.
- Inspect every reached block and its named output.
- Verify external effects in the target service.
- Publish only the version that produced the expected result.
Documentation map
The block reference is organized by task rather than by the exact size of each Designer accordion:
- Trigger Blocks cover manual, scheduled, public, messaging, queue, and issue-based entry points.
- Processing Blocks cover Sleep, Render, Code, DB Query, Web Request, Transform, Wait for all, and Subflow.
- Condition Blocks cover If, If / Else, and Switch routing.
- File Blocks cover reading and saving file content across internal and integration-backed storage.
- AI Blocks cover model selection, prompts, structured output, memory, attachments, tool access, usage, and runtime behavior.
- Messaging Action Blocks cover email, Slack, SMS, Signal, Teams, and WhatsApp operations.
- Integration Action Blocks cover queue, issue-management, and SSH operations.
- Layout Blocks cover Area and Sticky Note.
Each block article documents its inputs, outputs, settings, resource requirements, test procedure, runtime behavior, and common failure modes.
Troubleshoot the catalog
- A block is missing: disable Hide unavailable blocks and expand the relevant catalog category.
- A block remains unavailable: configure its required integration, database, agent, storage destination, or pipeline in the project's ownership scope.
- A live trigger does not start runs: confirm that the intended workflow version is published and that the external event reaches its configured source.
- A connection cannot be created: start from an output port and select a compatible target, or use the connection menu to see compatible block types.
- A block is on the canvas but never runs: verify that an upstream path reaches its input and that a condition did not select another output.
- A renamed block is hard to identify: inspect the block type shown in settings, logs, or exported workflow JSON.
Next steps
- Workflow Designer Overview
- Add, Connect, and Configure Blocks
- Use Template Expressions
- Test Runs in the Designer
Continue with Trigger Blocks to choose and validate a workflow entry point.